ADB, Android Debug Bridge, is a command-line utility that lets you communicate with your Android device from your computer. Android developers more often use it to debug their applications, and if you have ever tried flashing your Android smartphone, then you must have come across the term ADB.

ADB tool lets you control your Android device more efficiently via your PC through a set of commands. ADB command-line facilitates a variety of device actions such as installing and debugging apps, removing system apps and bloatware, etc. In general, the Android platform won’t let you perform these actions unless you root your device or unlock the bootloader. So, this is where ADB comes in handy.
Also read: How to Make Bootable USB Drive (Easiest Method)
So, let’s get started and see how we can install and use ADB on our Windows computers.
Enable USB Debugging on Android
Before I explain how you can install ADB on your computer, you need to enable USB debugging on your device. To do this, follow these simple steps.
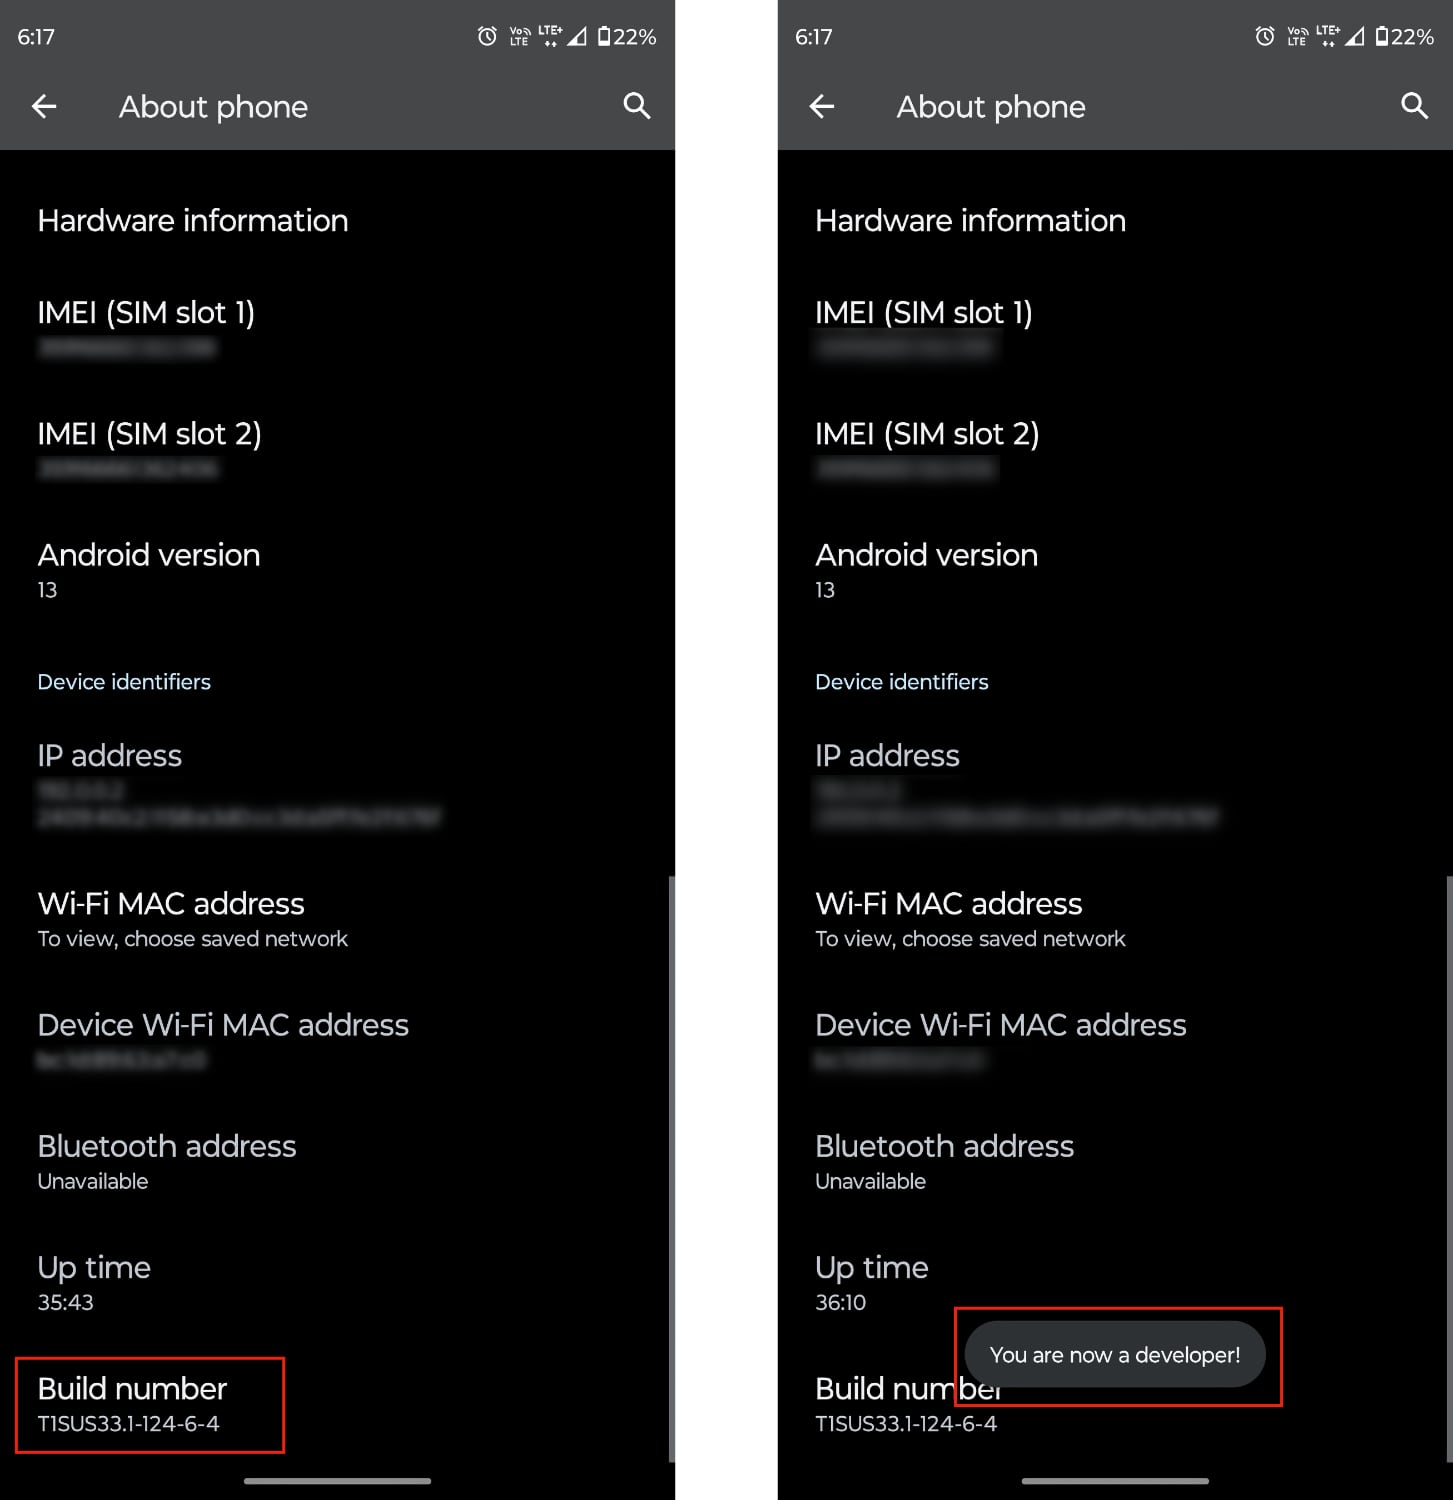
1. Open Settings > About Phone > Tap on “Build number” 4-5 times consecutively unless you see a message displaying “Developer mode has been enabled.”.
Please note that your ‘About phone’ page may vary depending on your device’s brand and model number.
2. Now, head back to ‘Settings‘ and go to ‘Developer options‘.

For Xiaomi devices, it is located in Additional Settings > Developer options. For OnePlus devices, you can find it in System > Developer options. It can vary from device to device.
3. Now, enable “USB debugging” and hit OK when asked for permission.

That’s all for the Android part. Now, you need to perform some simple steps on your computer.
Also read: How to Install Windows 11 on VirtualBox
Installing ADB on Windows
1. Download ADB Platform Tools for Windows from the Android developer website and extract the zip file.
2. Now open up that extracted folder and click on the address bar. Now type “cmd” and hit enter. This will open a command prompt window.

3. The next step is to connect your Android device to the computer with a USB cable.
4. Allow the USB debugging option when prompted for permissions on your Android device.

5. In the command prompt window, type adb devices and hit enter. If you see the “Allow USB debugging” prompt on your smartphone, tap the “Allow” button to give permission.

3. Now, you can enter ADB commands!
Here is a list of a few ADB commands for you to get started:
adb devices | To view the list of Android devices communicating with your computer |
adb push | To move a file onto your Android device programmatically |
adb pull | To move a file from your Android device programmatically |
adb install | To install apps programmatically using APK files |
adb reboot | To reboot your Android device |
adb backup | To create a full backup of your device. |
adb restore | To restore a backup. |
adb reboot recovery | To reboot into recovery mode. |
adb reboot bootloader | To reboot directly into the bootloader. |
adb shell | To enter the shell mode of your Android device. |
Various other ADB commands are also available depending on upcoming ‘ADB driver’ versions. You can get the list of all commands and their functions here.
So, that’s how you can install and use ADB on your Windows computer. The steps are quite easy, and these ADB commands will help you perform actions that are otherwise blocked or require root access on the Android platform.
Also read: How to Remove MIUI Bloatware From Your Xiaomi Device (Without Root)
But for some reason, if you are unable to perform ADB commands, there must be some driver-related issue. You can comment on your issue down below, and we will try to help you out.
Comments