Windows 11 is steadily rolling out to eligible devices all across the world, and newer PCs also come preinstalled with this new version of Windows that seems to be a pretty drastic departure from what we have come to know Windows to be, all in a bid to ‘get with the times.’

Among the numerous changes that Windows 11 brings to eligible PCs is a new and redesigned Battery Saver setting menu. This offers a lot of customization to users, thereby allowing them more granular control over how their PCs handle and manage the battery reserve.
In this post, we will show you how to enable battery saver mode in Windows 11. We will also quickly run you through the setup process of battery saver mode to suit your specific needs.
How to enable Battery saver on Windows 11 in Settings
First of all, you need to be running Windows 11, obviously. We have a guide on how to download and install Windows 11 on your PC, and you can check out the same in the links below.
Read more:
- How to download Windows 11 ISO file & do a clean installation
- How to run Windows 11 on an M1 Mac for free
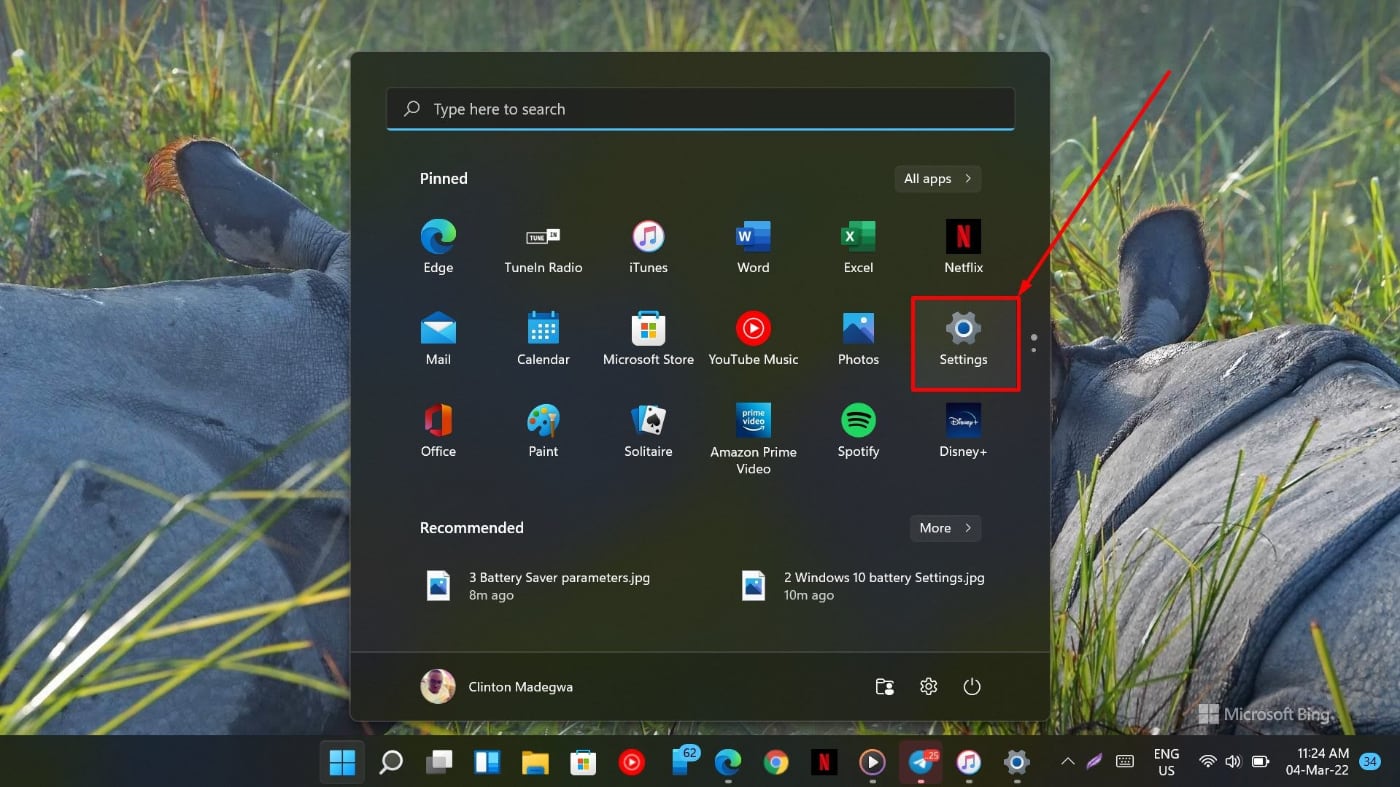
Next, you will need to click on the Start button and find Settings.
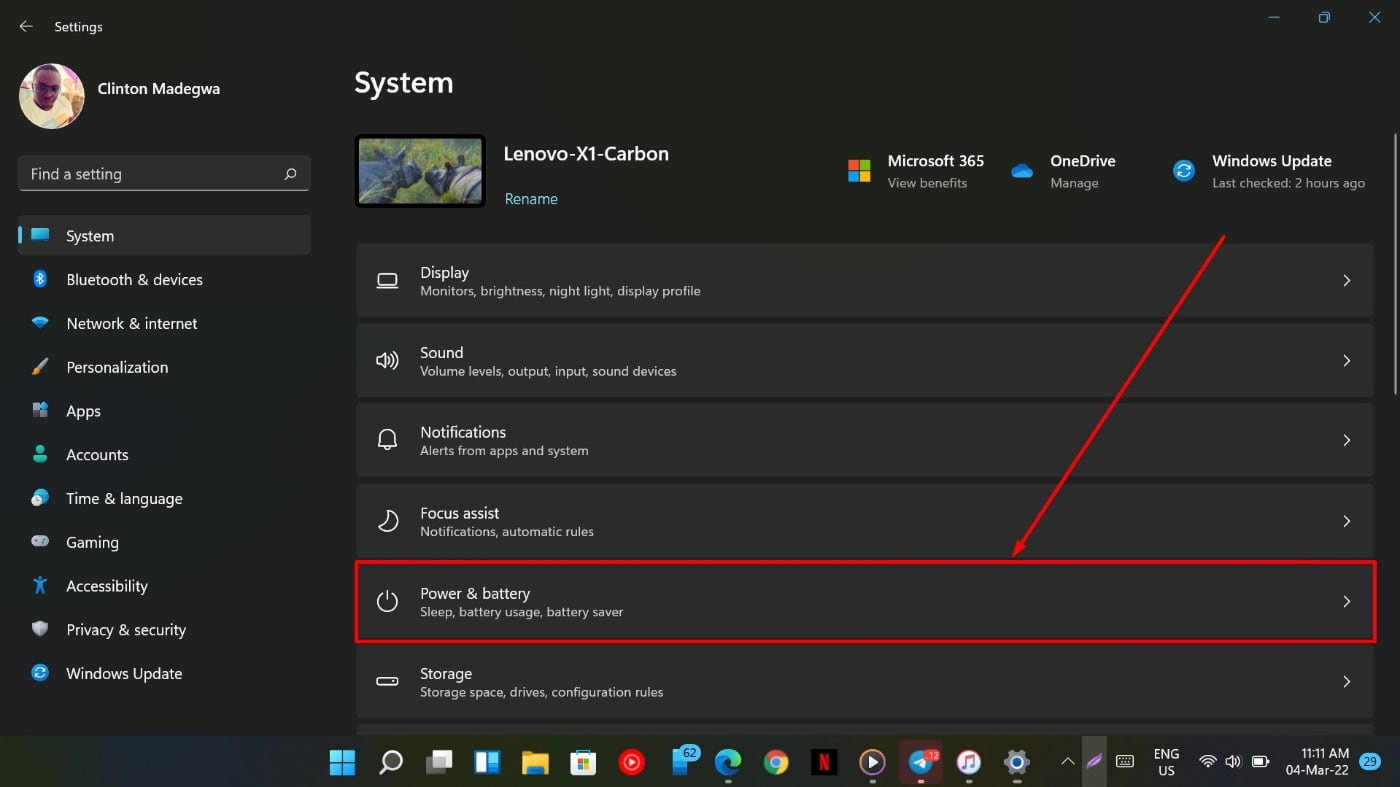
Now, on the Settings page, find the Power and battery menu option and click on it.
Scroll down to the Battery category, and you should see battery saver as the first menu option here.
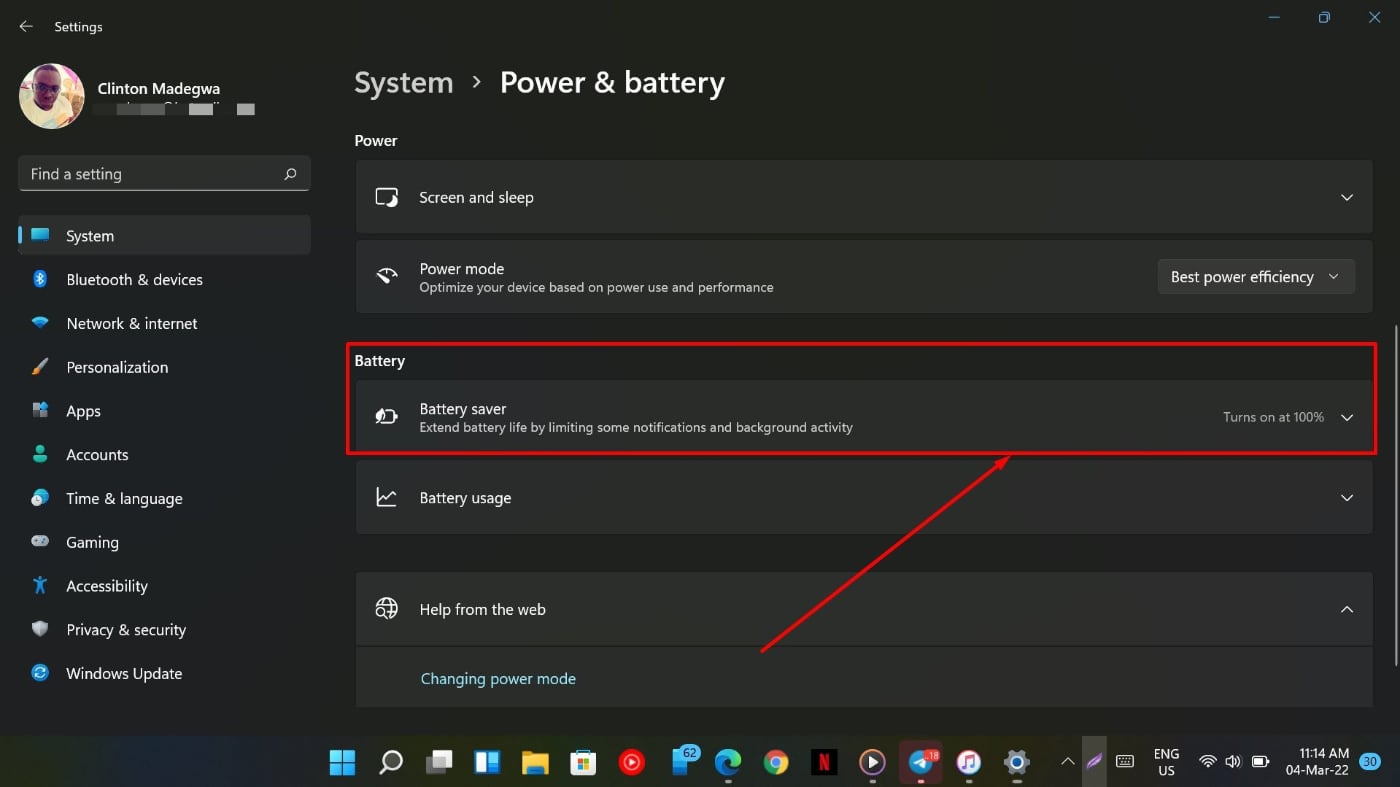
Now, you will need to click on the little drop-down arrow next to this menu option. This should reveal all the battery saver parameters that you can tweak in Windows 11.
These include the ability to schedule when you want the battery saver to automatically trigger itself based on the battery level.
In my testing, I found that setting it at 100% makes more sense as that ensures that it turns on immediately after you unplug your laptop, ensuring maximum battery longevity.
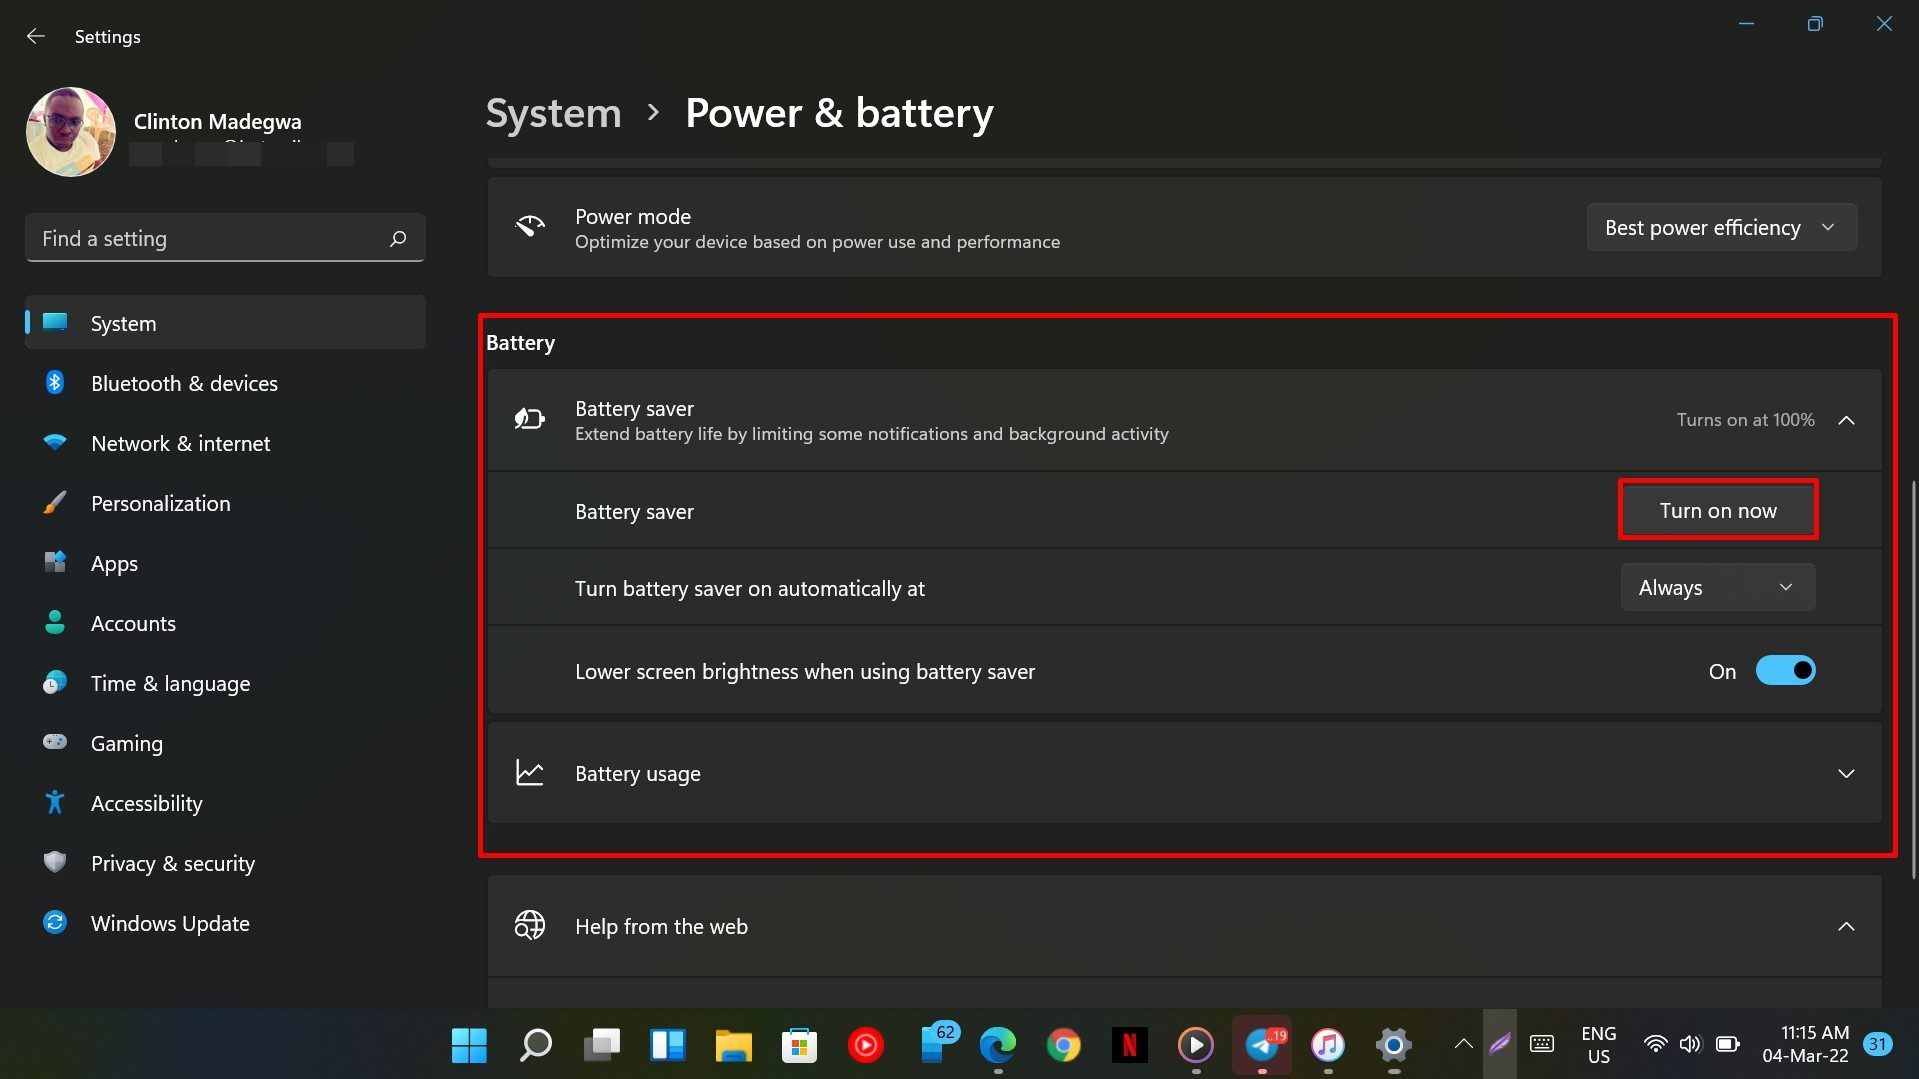
However, this comes at the cost of performance, so if you need to use your PC for some intensive tasks, maybe you might want to tweak the other settings.
These options also include the kind of performance you want out of your setup in battery saver mode. This allows your PC to lean towards battery endurance over performance or performance over battery life. You can toggle these settings according to your specific workflow and needs.
You also get to choose if you’d like Windows 11 to reduce your screen brightness in favor of battery life, and to turn on this feature, you can enable the “Lower screen brightness when using battery saver” toggle.
Also read: How to enable data saver mode in Google Meet
How to turn on Battery saver on Windows 11 using quick toggle
To go digging into settings every time you want to turn on this option doesn’t exactly seem like an elegant way of doing this. Luckily, there is a much faster way of doing this, albeit without the tweaking that the settings app offers you.
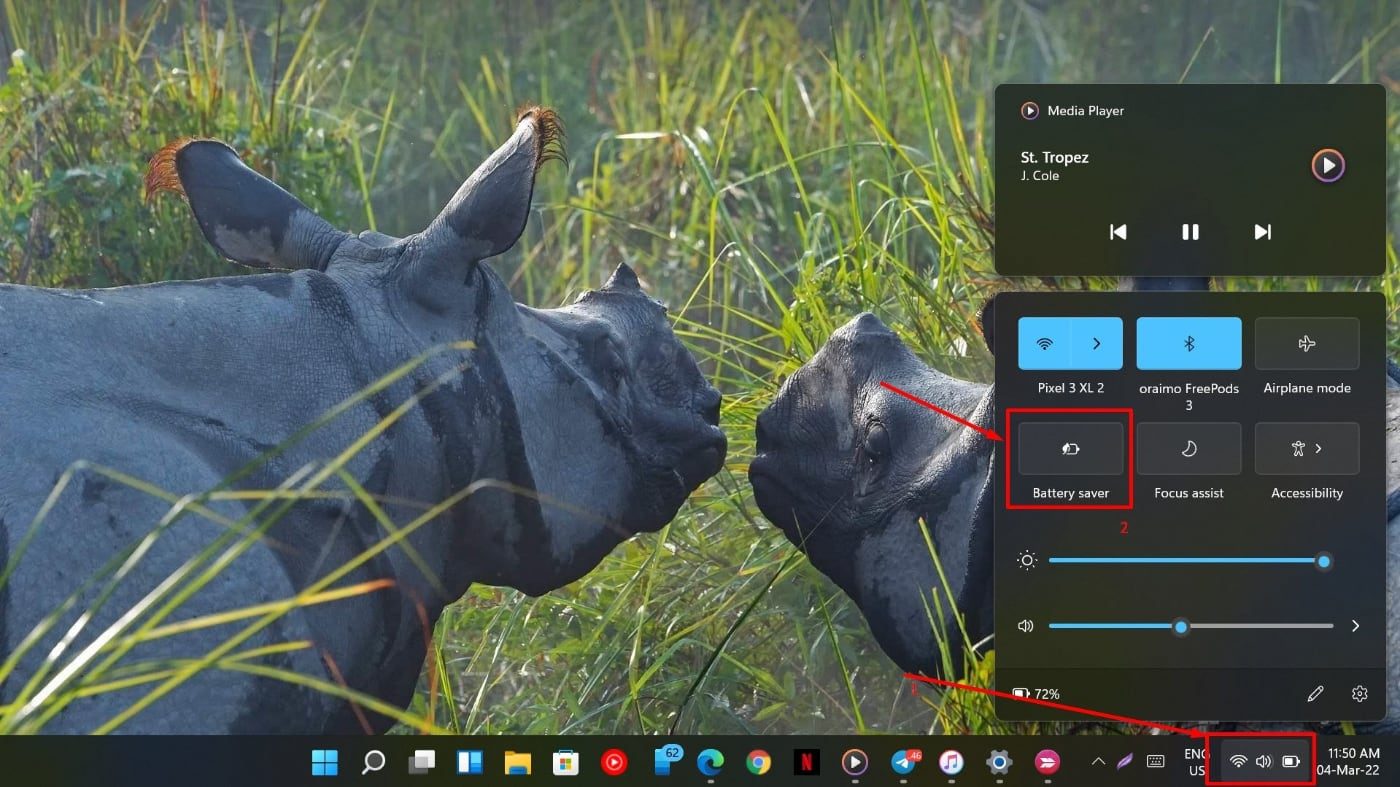
You can easily turn on the battery saver by going to your system tray and clicking on the battery icon to pull up the quick settings toggles. This then allows you to turn on or off the battery saver option.
And that’s basically it! That is how you use the Battery saver feature on your Windows 11 PC. Do you have any other features of Windows 11 that you’d like us to try out? Tell us in the comments section below.
Comments