Malicious apps and games can often make their way into our computers despite being taking all the precautions, such as having antivirus software installed.

More often than not, these suspicious programs are disguised as those reliable apps which we use for our day-to-day tasks.
Due to these growing security concerns, it is important that we take some steps to secure our personal files and data to protect ourselves from such apps.
Most of the time, you don’t need to install any third-party application to secure your data since Windows Firewall and Microsoft Defender have improved a lot over the years.
Microsoft is constantly adding new features to these programs with regular updates, so they can easily compete with any good antivirus in terms of protection. So even if you don’t have antivirus software installed, you can take some steps to secure your important data.
Also read: How to Install Windows 11 on VirtualBox
Today, we will show you how to block a program using the Windows Firewall feature.
How to block applications from accessing the internet in Windows 11
If you feel a malicious application has infiltrated your PC, then the first thing to do is to block the application from accessing the internet to prevent any further damage to your system.
The inbound and outbound rules feature of Windows Firewall prevents any application installed on your computer from sending or receiving internet traffic.
Inbound rules can block any incoming internet data to the particular application preventing it from establishing any contact with connections outside of your computer.
Similarly, the outbound rules can block the particular application from sending any data or traffic to the internet.
You can block the inbound and outbound connections for an application to stop it from connecting to the internet.
To block an application using the Firewall on Windows 11, follow the step mentioned below:
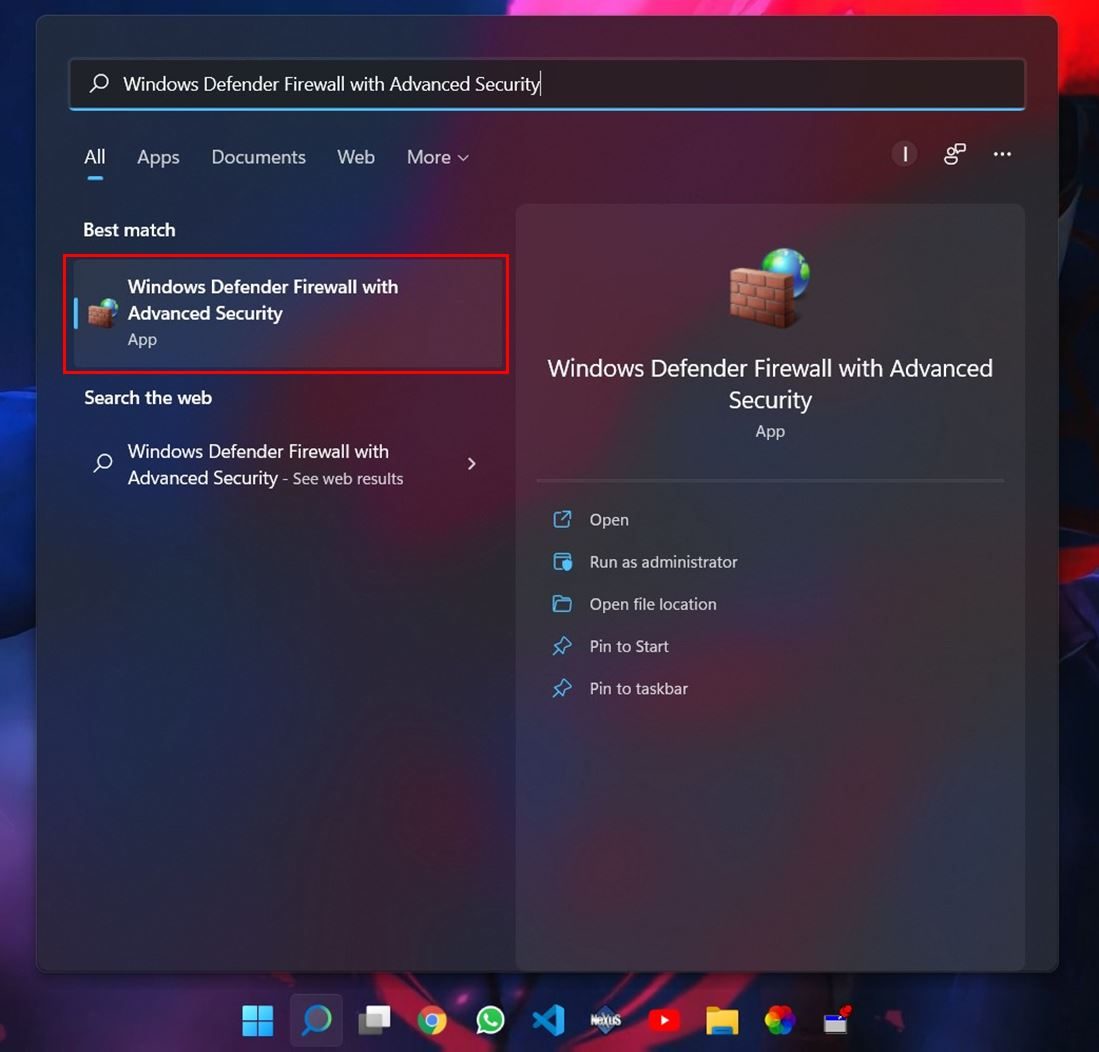
1. Click on the Start button and search for Windows Defender Firewall in the search bar. A list of results will appear on your screen; open Windows Defender Firewall with Advanced Security.
2. Now, in Windows Firewall, click on the Inbound Rules option in the left pane of the window.
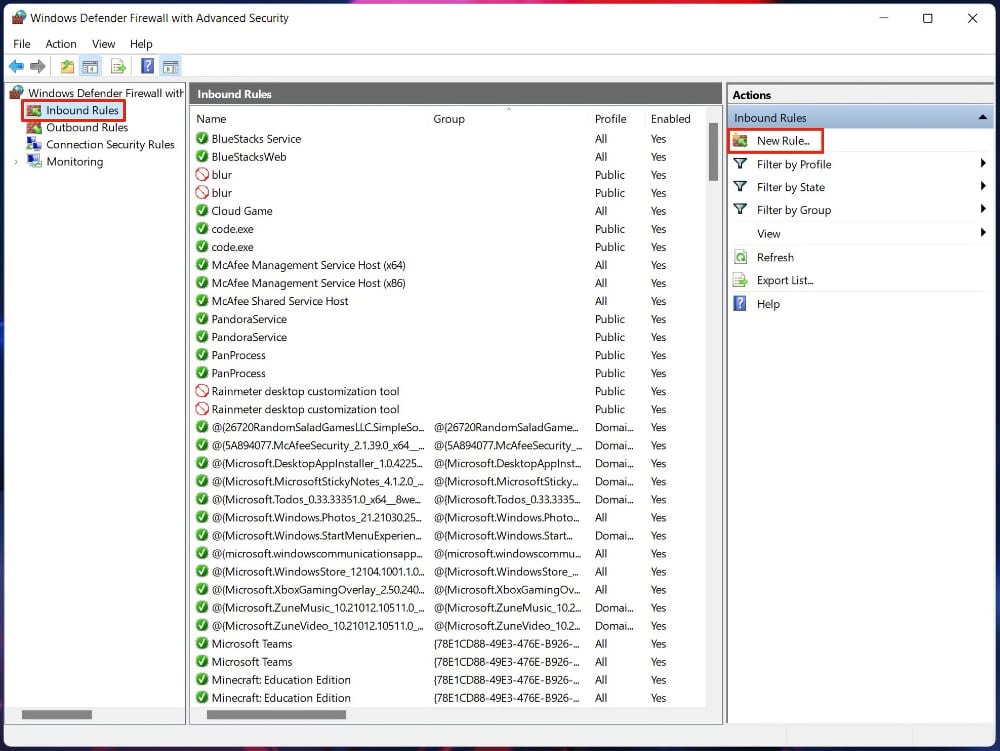
3. A list of inbound rules will appear on your screen. Click on the New Rule option in the actions column shown on the right pane.
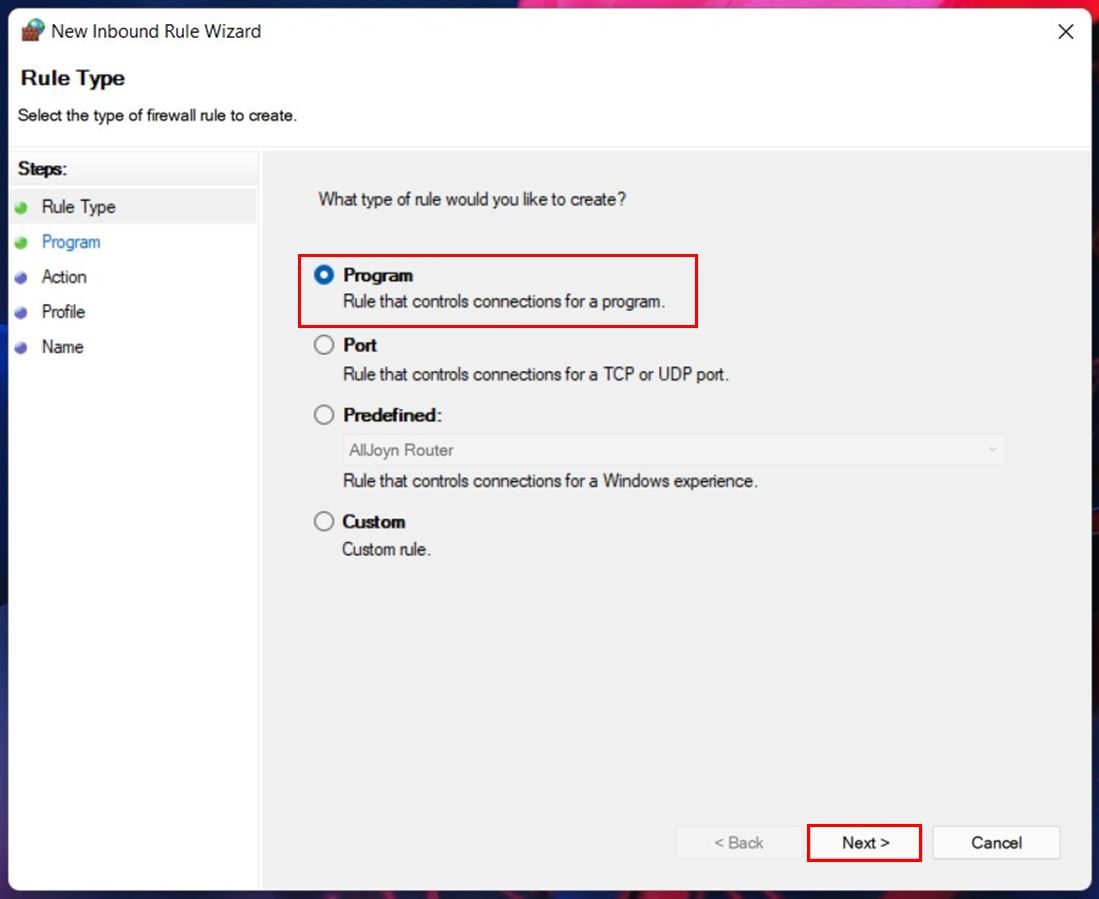
4. A wizard window will now open, select the Program option and then click on the Next button.
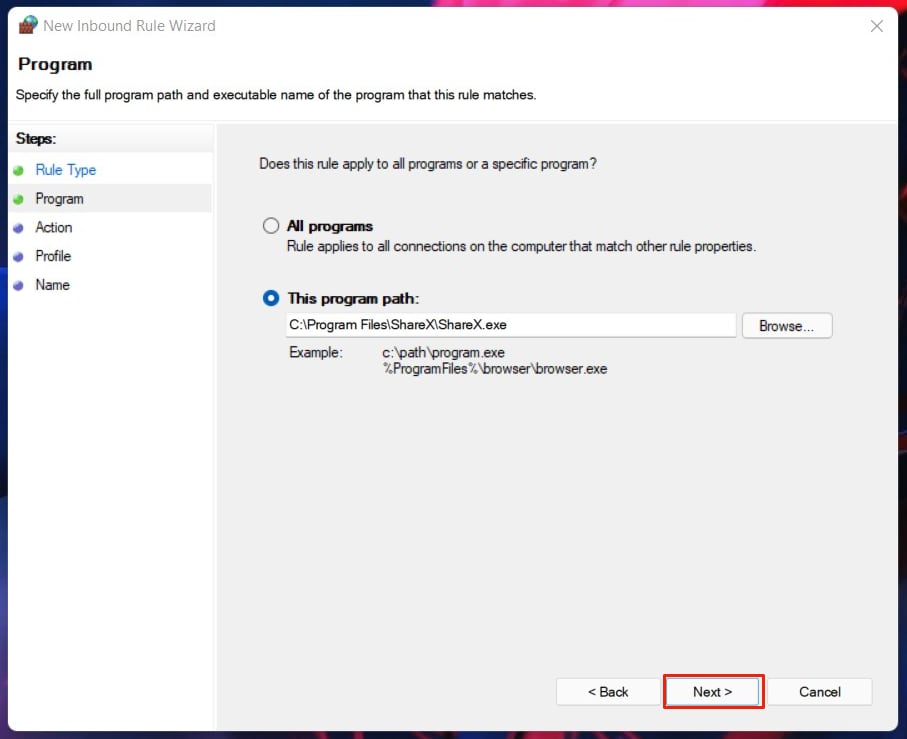
5. Now, you need to select the “This program path” option to block the program in Firewall.
You can enter the path of the program manually or use the Browse option to locate the program you wish to block. After selecting the path, click on the Next button to proceed.
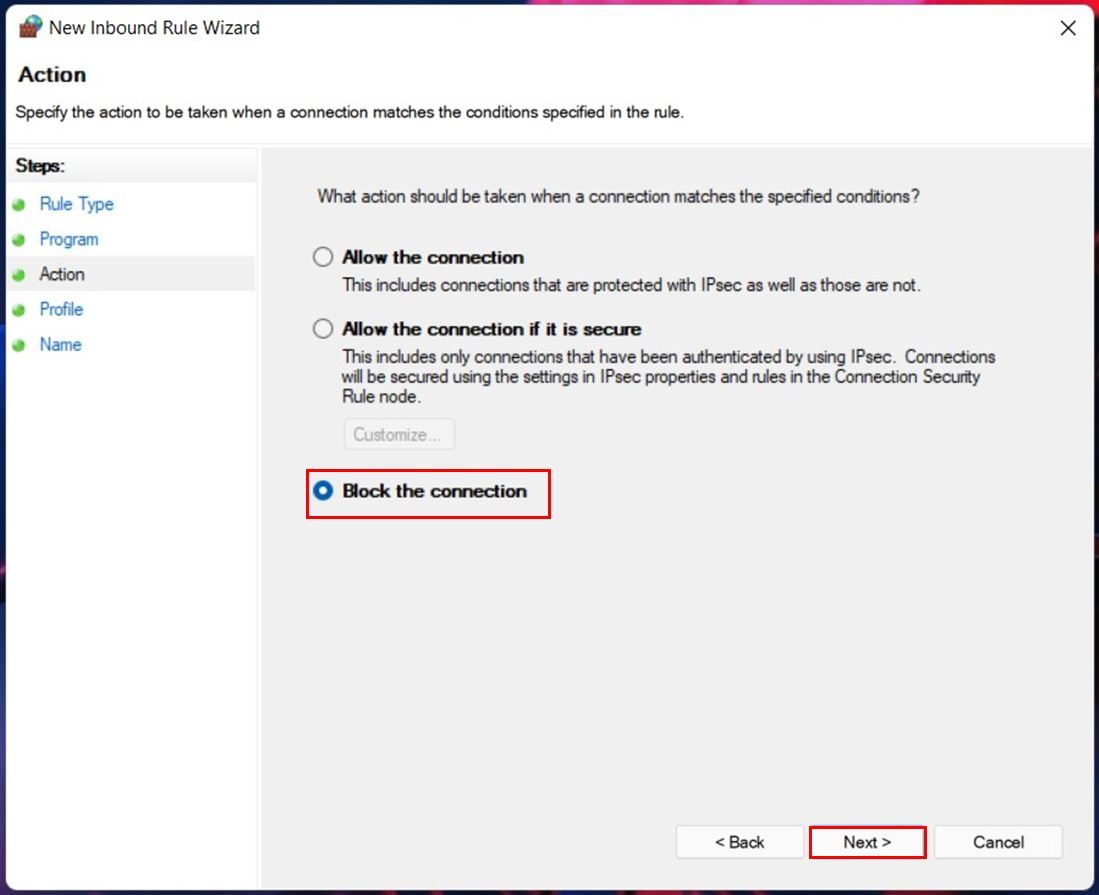
6. Select the “Block the connection” option in the next window and click on Next.
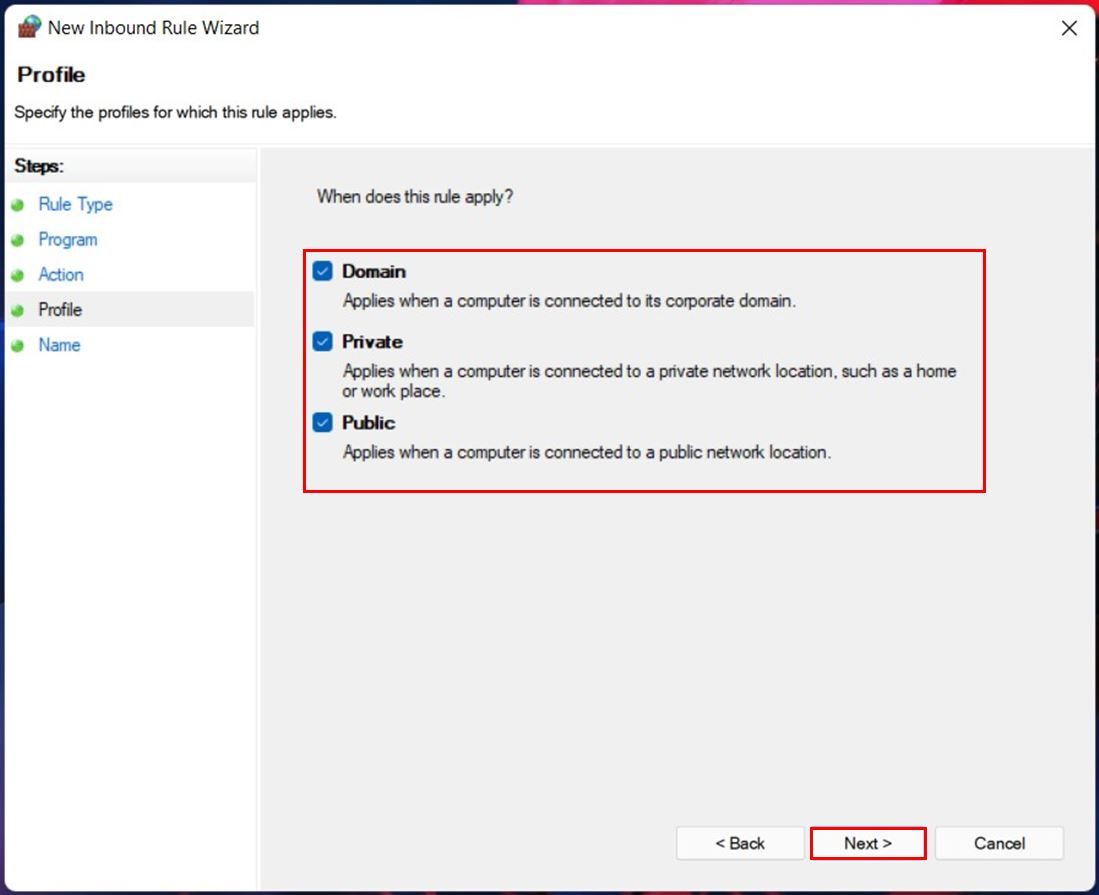
7. Windows will now ask you when it should apply this new rule.
You can select the network according to your choice, or you can select all the three options, Domain, Private and Public, if you are not quite sure. Doing this will block the program when it gets connected to any of these network profiles.
Now click on the Next button to continue.
8. Now, you need to enter a name for this rule. You can use any name you wish. Just try to select a relevant name and description so you can easily identify it in the future.
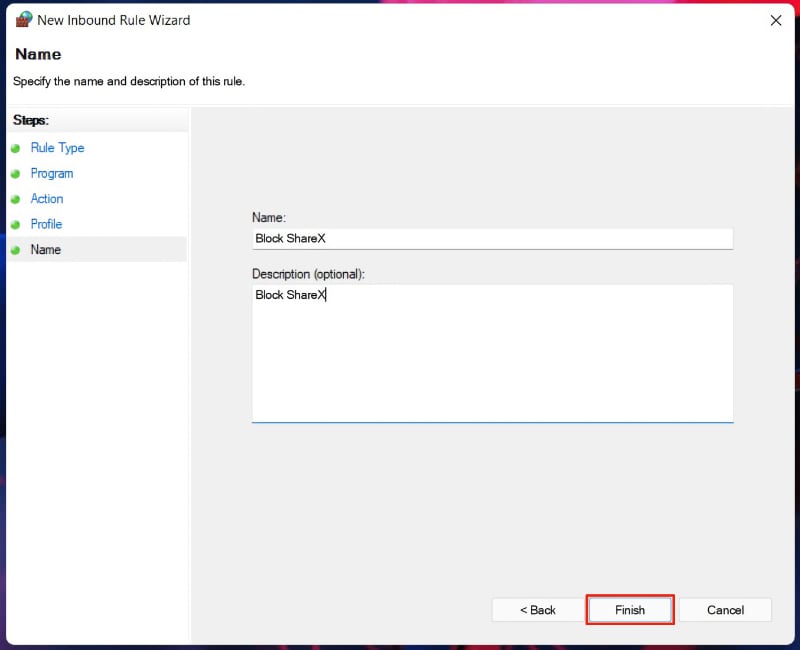
9. Click on the Finish button to add the rule to Windows Firewall.
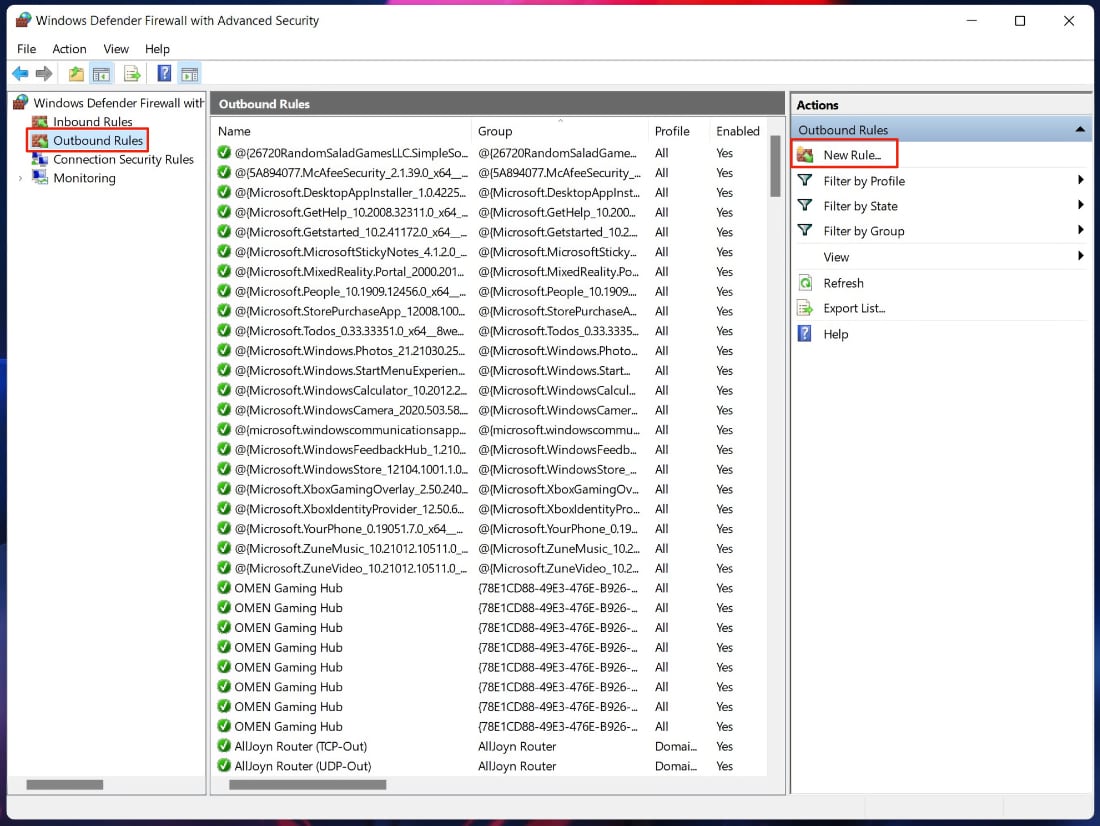
10. Now, in the Windows Firewall menu, click on the Outbound Rules options in the left pane of the window.
11. Click on the New Rule option in the Outbound Rules column on the right side of the window.
12. Follow the same steps from step 4 to step 9 to add a new outbound rule for the program of your choice.
The program will no longer be able to access the internet after you add both the inbound and outbound rules to block its connection.
If you wish, you can also partially block the program by adding just an inbound or outbound rule to block its connection to the internet.
Adding just one rule will block either the inbound or outbound connections of the application instead of blocking both of them.
This can be helpful in specific scenarios where you want an application to receive data from the internet but don’t want it to send the data back to its servers. For example, if you block the outgoing connections in a cloud storage application, it will be able to download the files to your system but will not be able to upload your personal files back to its servers.
Do note that Windows Defender Firewall needs to be turned on in the settings for these features to work. Thankfully, Windows 11 enables the Windows Firewall by default, and it can secure your computer from any potential threats posed by malicious programs.
Also read: 6 Best Free Firewall Apps for Android
You can check if Windows Firewall is enabled on your computer by clicking on Start and then searching for Windows Security in the search bar. Now open Windows Security and select the Firewall & Network protection option. Ensure that the “Firewall is on” is displayed across all the network profile options.
Windows Defender Firewall is a pretty useful and nifty addition to the Windows suite of apps. However, not many people are aware of its potential and often ignore it just because of the old design and interface.
It can be quite handy if you wish to block the internet access of any application or game in case a malicious app gets installed on your computer. If you have any doubts or questions, feel free to ask them in the comment section below. We will try to help you out.
Comments