System Integrity Protection (SIP) is a feature introduced by Apple for security in OS X EI Capitan.
The security feature helps prevent the editing of root-level files. It prevents both you and the programs from altering the base-level files.
But, it sometimes hinders the functioning of certain programs too.
Also read: How to Download and Play Netflix Games on Android
This is why you may feel the need to disable it. In this article, we will give you a detailed guide on how to do so.
Before we dive into the technical process, let us first discuss the importance of change that you are about to do on your system.
Table of Contents
Advantages of System Integrity Protection
System Integrity Protection (SIP) was launched as a security feature in OS X El Capitan.
It helps protect directories, processes, and files from being modified at the root level. It prevents malicious software from making any significant changes to your system.
The SIP feature hence prevents any malpractice by hackers even if they have your password.
So for the average users, System Integrity Protection is a good feature that they do not need to get rid of.
Some of the directories protected by SIP are bin, usr, sbin, system, and the majority of the preinstalled apps in the Applications folder are also protected. It also prevents a lot of software from being installed on macOS.
Therefore, if you want to install any third-party restricted apps or want some flexibility on your system, then you might want to disable SIP.
However, it is recommended that you re-enable it once you are done with your task.
How to turn off System Integrity Protection on Mac
Follow the steps below to disable SIP on macOS.
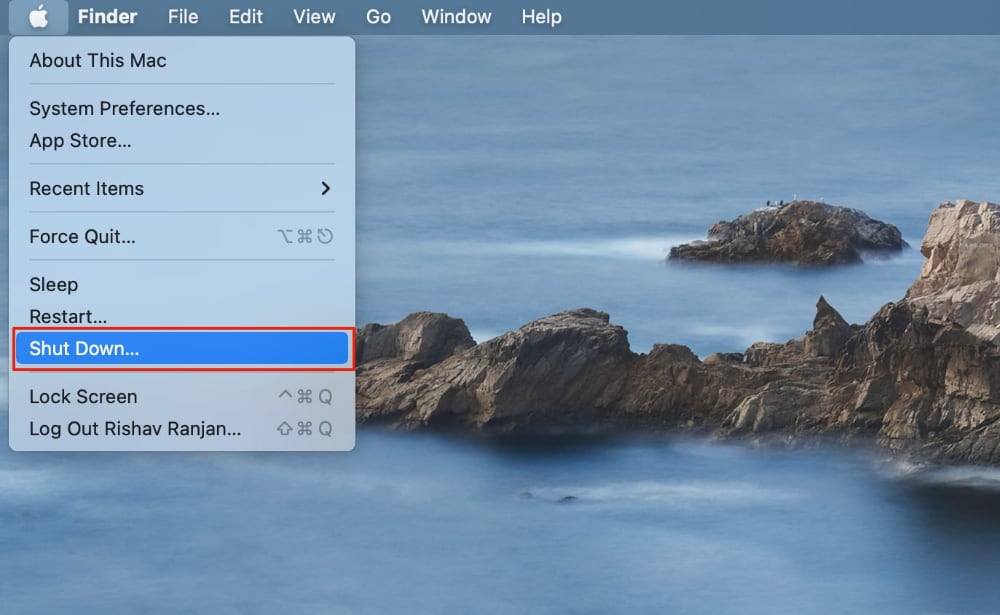
1. Shut down your Mac.
2. You need to enter recovery mode to edit system settings and disable System Integrity Protection on Mac. To do so, press and hold the power button until “Loading startup options” appear.
3. Click on Options and then click on Continue.

4. Now, log in to your user account, then click Next.
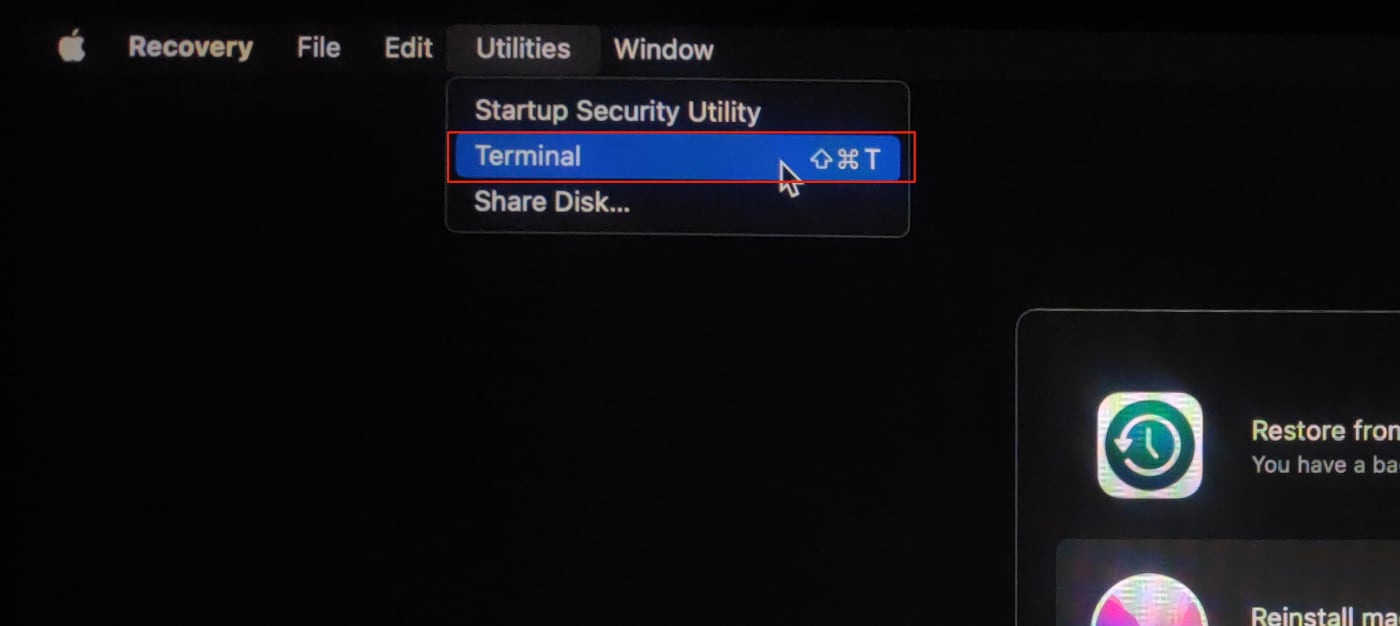
5. Go to Utilities and click on Terminal.
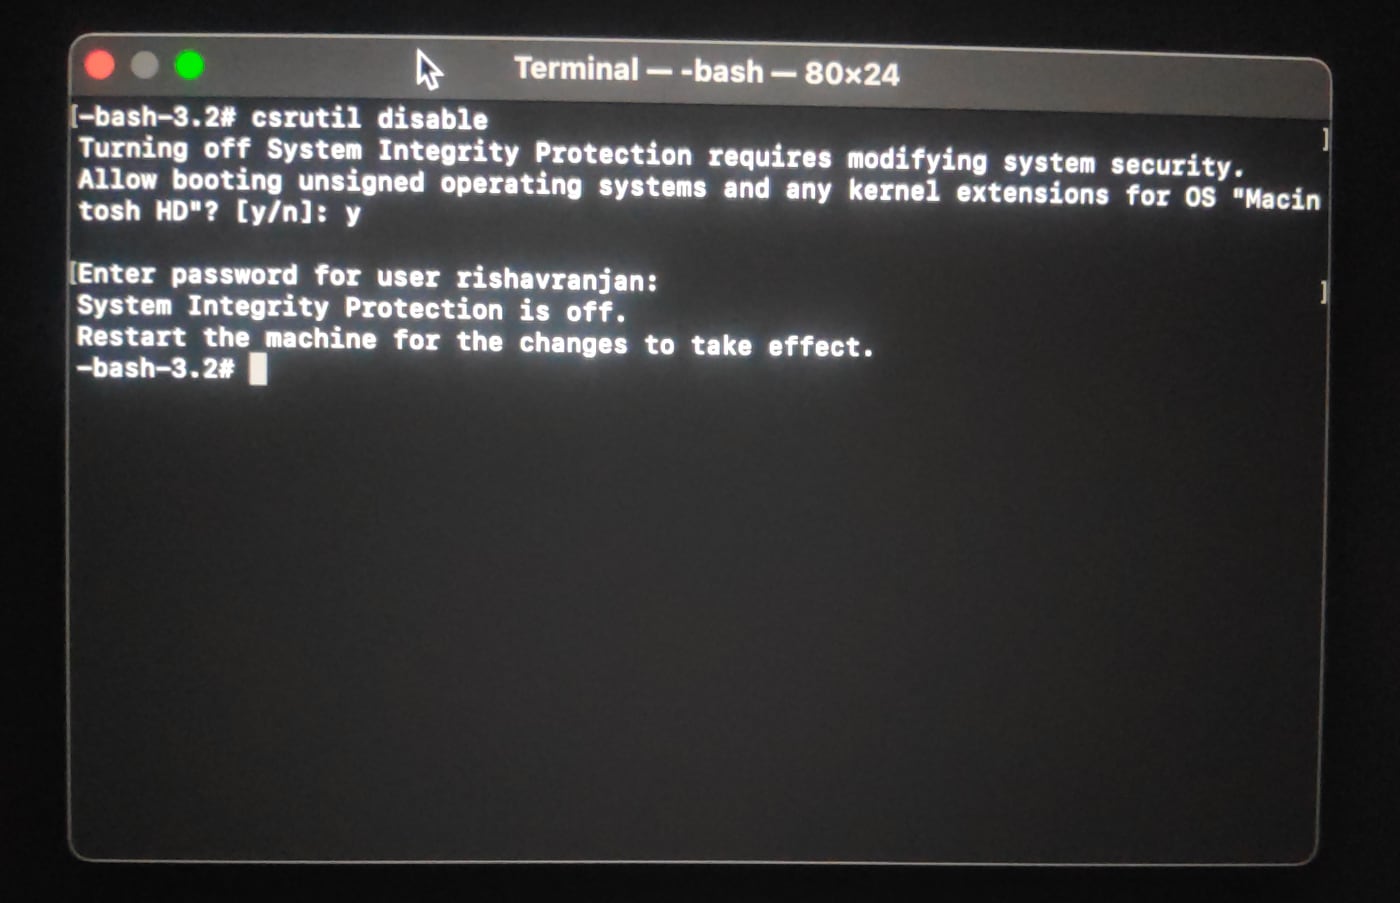
6. Type in csrutil disable and press enter.
7. Next, type Y for yes and press enter.
8. Now, enter the password for the administrator account and press enter.
9. Now, restart your computer.
After doing this, your Mac will reboot, and the System Integrity Protection will be disabled when it starts up.
How to check the status of System Integrity Protection on Mac
Considering how important this safety feature is, it is essential to be aware of its status on your Mac.
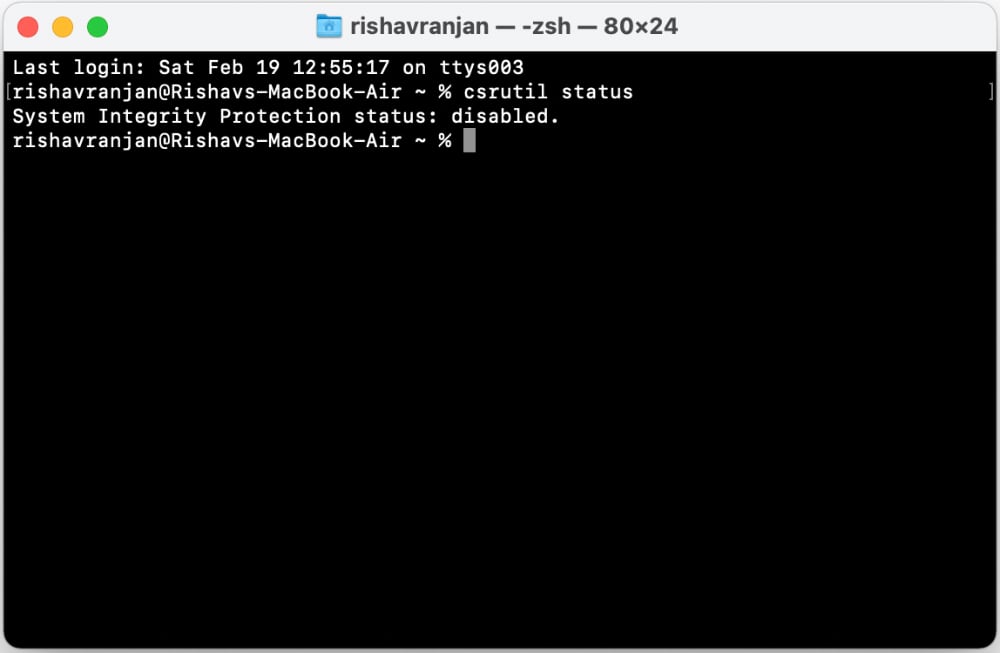
- Go to the Terminal.
- Type in crsutil status.
- If you just disabled SIP, you should see “System Integrity Protection status: Disabled” on your screen.
System Integrity Protection is an important security feature on your Mac. It should only be hindered if you are 100% sure of what you are doing.
The above tutorial is enough for you to disable SIP on Mac and go on with your tasks. However, make sure that you re-enable the System Integrity Protection once you are done with the task.
Comments