Whether you want to record your computer screen for a presentation, tutorial, or sharing a game clip on social media, it is very important to learn how to record your screen on Windows PC and Mac computers. Especially during this time of global pandemic when everyone is doing their work from home.

There are plenty of ways to record computer screens, and nowadays, Windows 10 and macOS come with built-in tools that can get the job done easily. However, those tools are very limited when it comes to features and functionalities. Thankfully, there are third-party applications that are feature-rich and very easy to use.
Also read: Best Video Editor Apps for Android
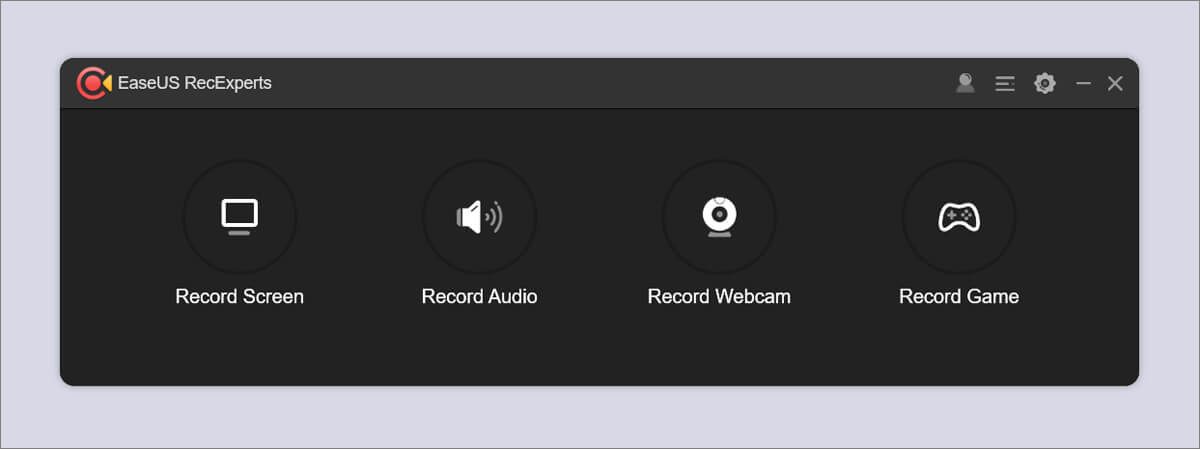
EaseUS RecExperts is one such application that provides lots of features, and yet it is super easy to use. With EaseUS RecExperts, you can record computer screens, webcam, audio, and games. Moreover, you can also edit those recorded clips in the recording application itself.
EaseUS RecExperts allows you to record video and audio simultaneously, which means you can do voiceover while recording your screen. And the best part is that you can also remove background noise and boost your audio just by using the application.
The task scheduler is one of the many features that I have used a lot on this app. It can be used to start recording at a specific time, and you can also conveniently schedule multiple tasks.
Record computer screen with EaseUS RecExperts
Let’s see how we can record our computer screen using EaseUS RecExperts. Follow these simple steps below, and you are good to go.
- First, download and install the screen recorder on your computer.
- Launch the application and go to Record Screen. Here, you can select from the region to choose the area you want to record. You can either record your full screen, a window, or a specific region. You can also choose to record your webcam by selecting the available webcam from the Webcam drop-down menu.
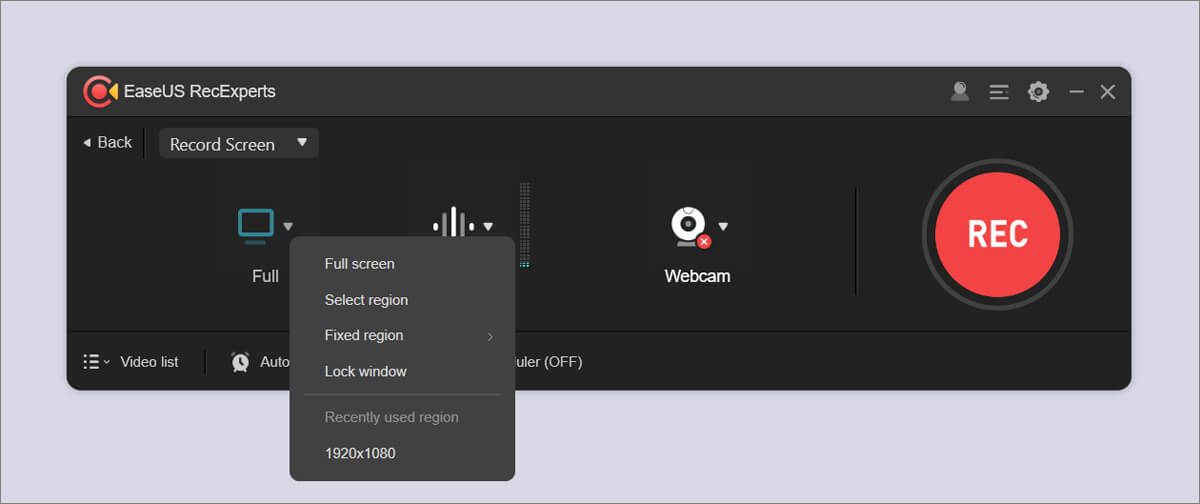
3. Then click on the red REC button to start the screen recording. You will see a floating toolbar from which you can pause or stop the recording, make annotations, take screenshots, highlight the cursor, or zoom in on a specific region. The toolbar will hide when it is not in use. To completely hide the toolbar, go to Settings > Floating toolbar and tick the Hide when recording option.

4. When done recording, click on the red stop button to stop your screen recording. The clips will be saved in the Documents > EaseUS > EaseUS RecExperts folder on the system drive by default. You can later play or edit those clips in RecExperts.
So that’s how you can record your computer screen using EaseUS RecExperts. The screen recording software is very easy to use, and the interface is relatively straightforward.
RecExperts makes it easy for anyone who wants to record their screen on Windows and Mac. It is a paid application, but you can use it for free in trial mode for a while before making the purchase.
Comments