The System Integrity Protection (SIP) was introduced as a part of OS X EI Capitan.
Launched by Apple, it is a security mechanism that ensures a safer experience for the user. It is designed similarly to the security mechanism being used in iPhones and iPads for several years now.
The function of System Integrity Protection, also known as rootless, is to prevent any changes in the root files.
It needs to be enabled on all Macs running OS X El Capitan and the above versions.
Some recent MacBook Pro 2016 buyers have found System Integrity Protection to be disabled in their devices.
By the time Apple fixes the glitch, we will talk about how you can enable SIP all on your own.
How to check the status of System Integrity Protection on Mac
By default, all Mac systems come with the SIP already enabled. But in some cases, as found recently, it was disabled.
It is extremely important that this extra layer of security is enabled in your system.
Before doing that, you have to make sure if it is actually disabled. Here is how to do so:
- Launch Terminal on your computer.
- Type in csrutil status in the Terminal prompt.
- Press enter.
When you follow this process, one of the two cases listed below will occur:
Case 1: System Integrity Protection is enabled.
In this case, you will receive the message “System Integrity Protection status: enabled.”
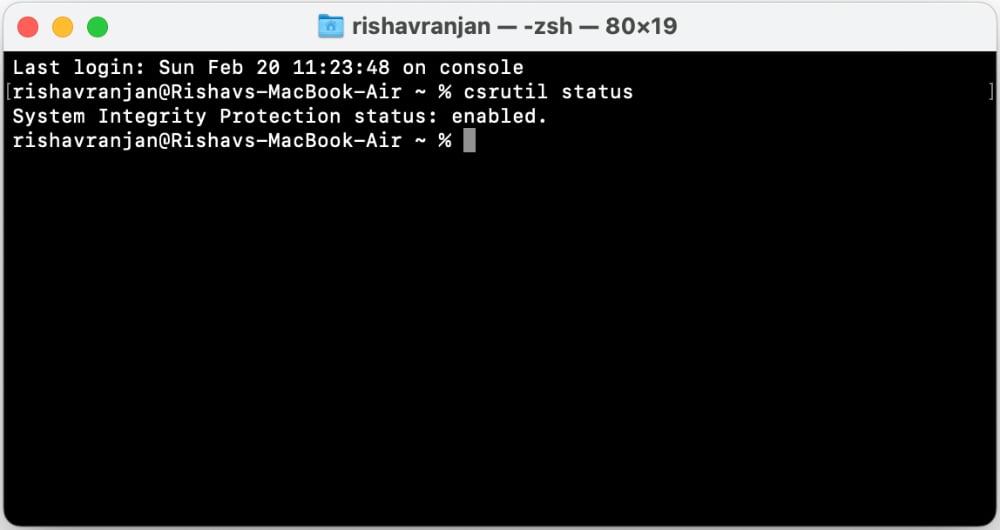
If you see this response, you are good to go. You do not need to worry about your system’s security.
Case 2: System Integrity Protection is disabled.
In this case, you will receive a message saying, “System Integrity Protection status: disabled.“
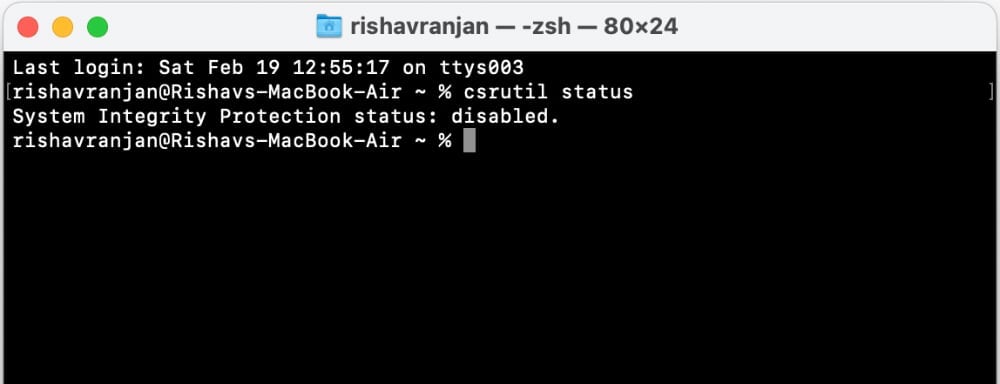
If you see this message, it is best for you to immediately turn on SIP on your computer. Continue to read this article to find out how.
How to turn on System Integrity Protection on Mac
By now, we have understood the importance of SIP for our Mac systems.
Now in case it happens to be disabled on your system, make sure you enable it immediately.
Just follow the steps below to enable SIP on your Mac
1. Shut down your Mac.

2. You need to enter recovery mode to edit system settings and enable System Integrity Protection on Mac. To do so, press and hold the power button until “Loading startup options” appear.
3. Click on Options and then click on Continue.

4. Now, log in to your user account, then click Next.
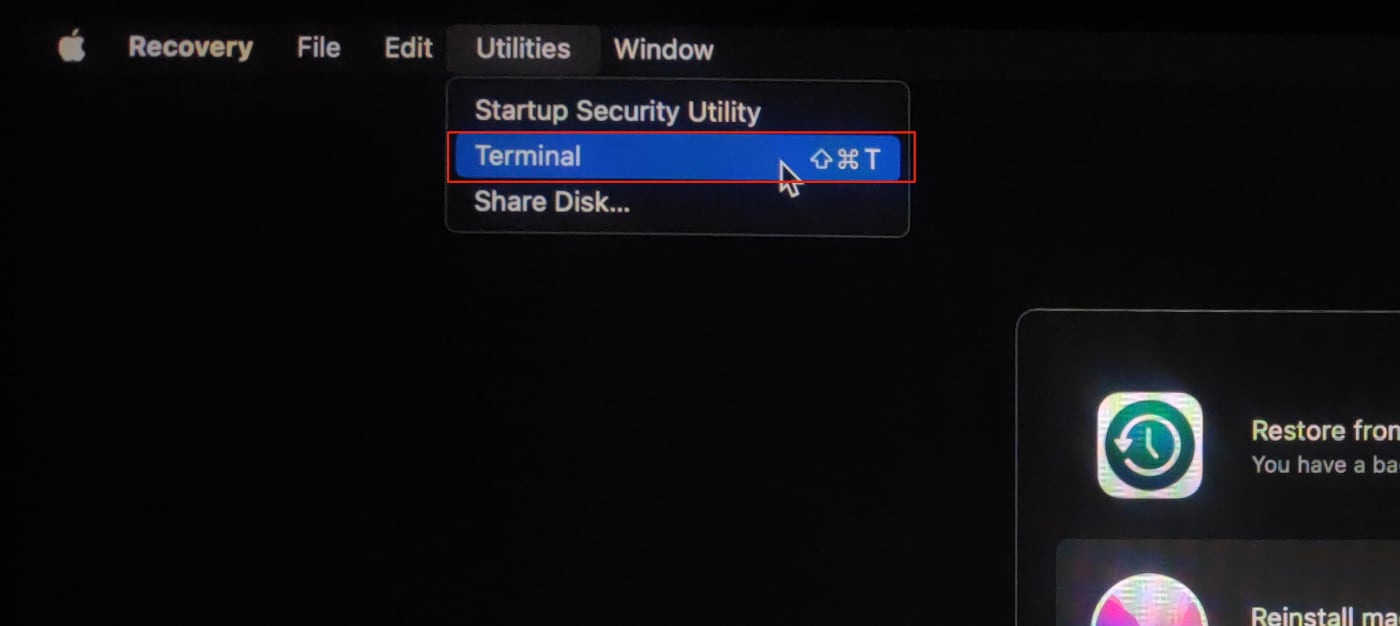
5. Go to Utilities and click on Terminal from the menu.
6. Type in csrutil enable and press enter.
7. Next, type Y for yes and press enter.
8. Now, enter the password for the administrator account and press enter.
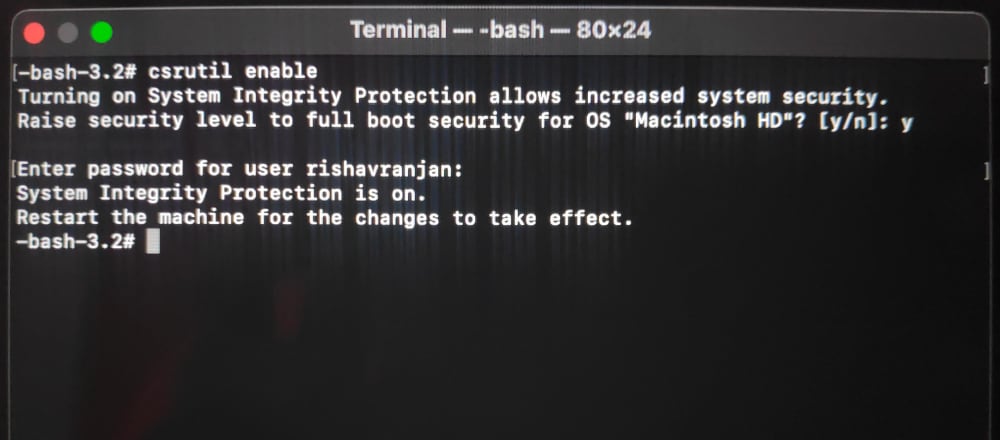
9. Now, restart your computer.
Now when your system restarts, the System Integrity Protection should be enabled.
To check the status of SIP, go to the Terminal on your Mac. Then type in “csrutil status” and press enter.
If all goes well, this time, you will receive a message saying “System Integrity Protection status: enabled.“
And with this, you once again have a safe and secure system.
Comments